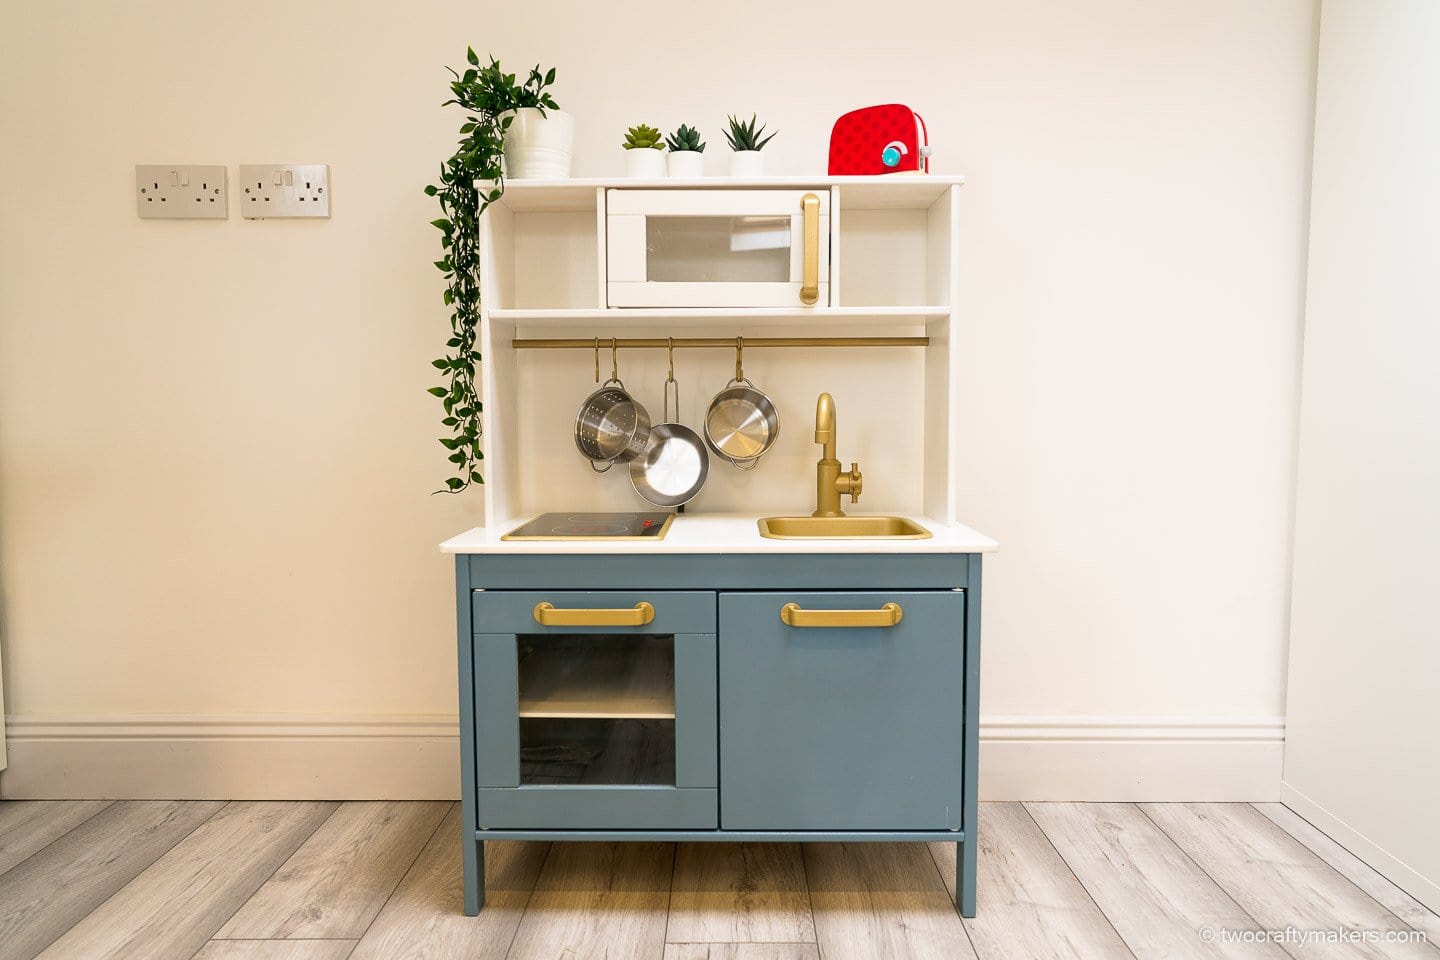
The Ikea Duktig play kitchen is a wonderful addition to any playroom but, like any kitchen, it can benefit from a little sprucing up! Last weekend we decided to give our Ikea play kitchen a makeover. The kids love the new and improved version of their kitchen and it looks so fab in their playroom.
This mini project has brought us and the kids so much fun and we wanted to share all the details of our Ikea play kitchen hack: we’ve included all the materials, instructions and tips that you’ll need to get to work on your very own Ikea play kitchen makeover!
Optional Extras
- Protective Spray Paint : a protective clear coat will add an extra layer of durability to the paint on the wood and metal parts of the kitchen.
- MDF 33cm x 68 cm: the kitchen is open in the middle section behind the hob and sink. If you want to close this off and add a back splash then stop by a hardware store and get them to cut a piece of MDF 33cm x 68 cm.
- Contact Paper: we opted for a plain white counter top but you can just as easily use contact paper, in marble for example, for a sleek finish. If you opt for a back splash, then pick up some adhesive tiles to make it pop. There are some beautiful marble effect contacts like this one that looks great on the kitchen.
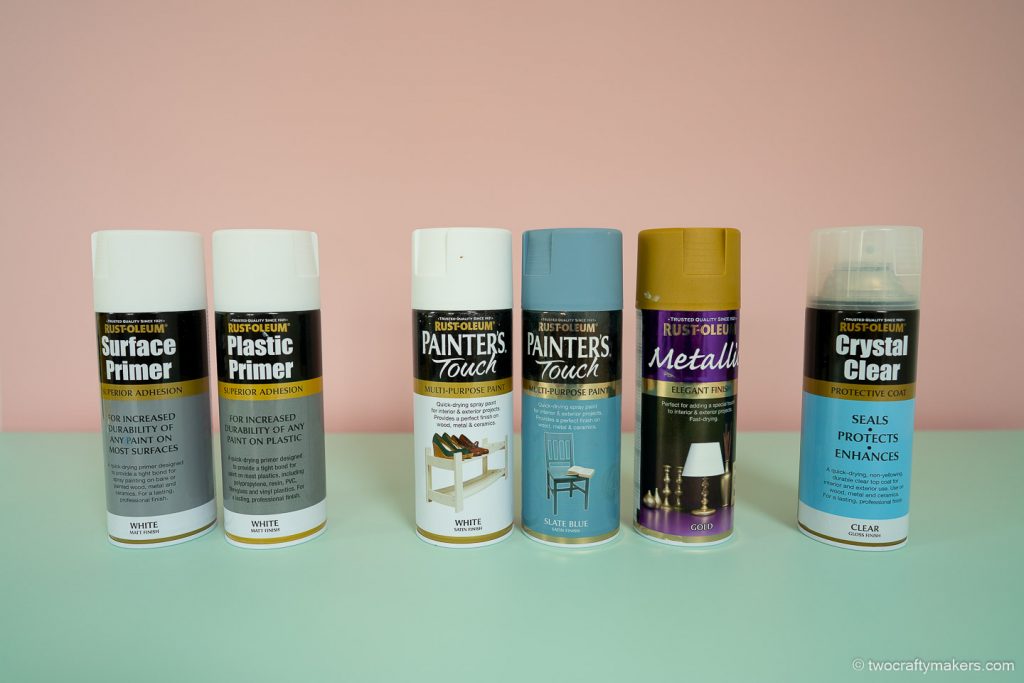
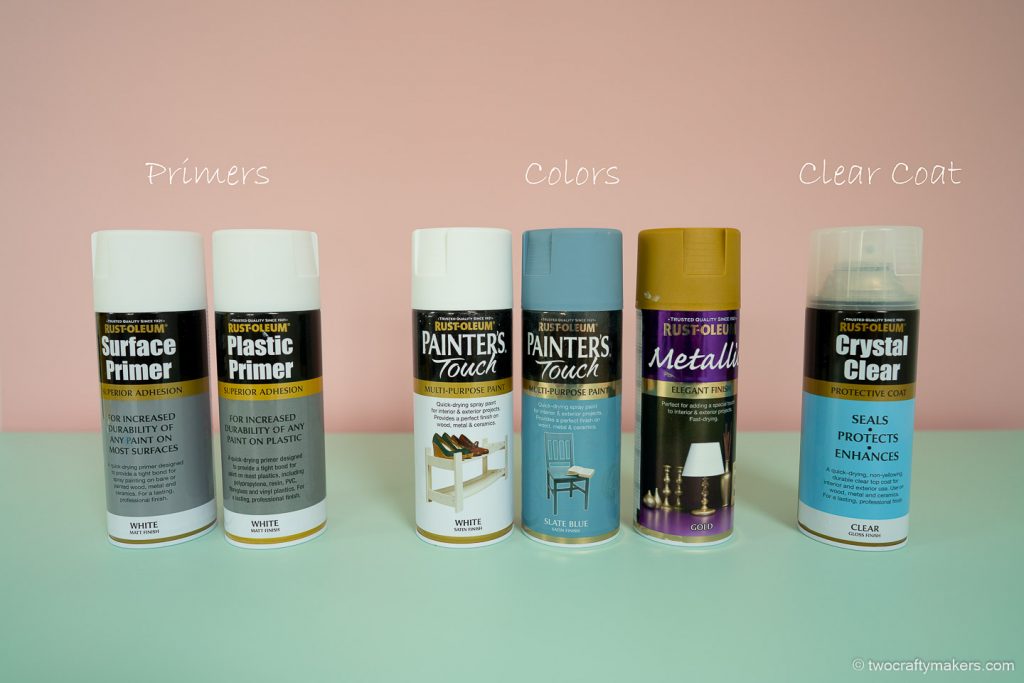
Ikea play kitchen hack tip: we highly recommend using Rustoleum spray paint. It gives a beautiful finish and the color selection is very good. All our spray paint and primer was Rustoleum and it looks great.
Tools
- Rubber gloves: we use regular DIY gloves or these black nitrile gloves or painting and highly recommend using them with the Rustoleum spray paint – check prices now!
- Box Cutter / Stanley knife for trimming the painters tape
- Cardboard box: to create a back splash and mounting station for spraying the kitchen parts
- No products found. the paint is dangerous if inhaled so make sure to protect yourself with a painters mask and use the spray in a well ventilated area.
Ikea Play Kitchen Hack: Painting
Spray or Regular Paint
While you can use regular wood paint with a brush to paint the Duktig, we found that spray paint gives a much smoother and cleaner finish. Both painting and drying were super quick and we’d definitely recommend using spray paint
Choosing the paint colors
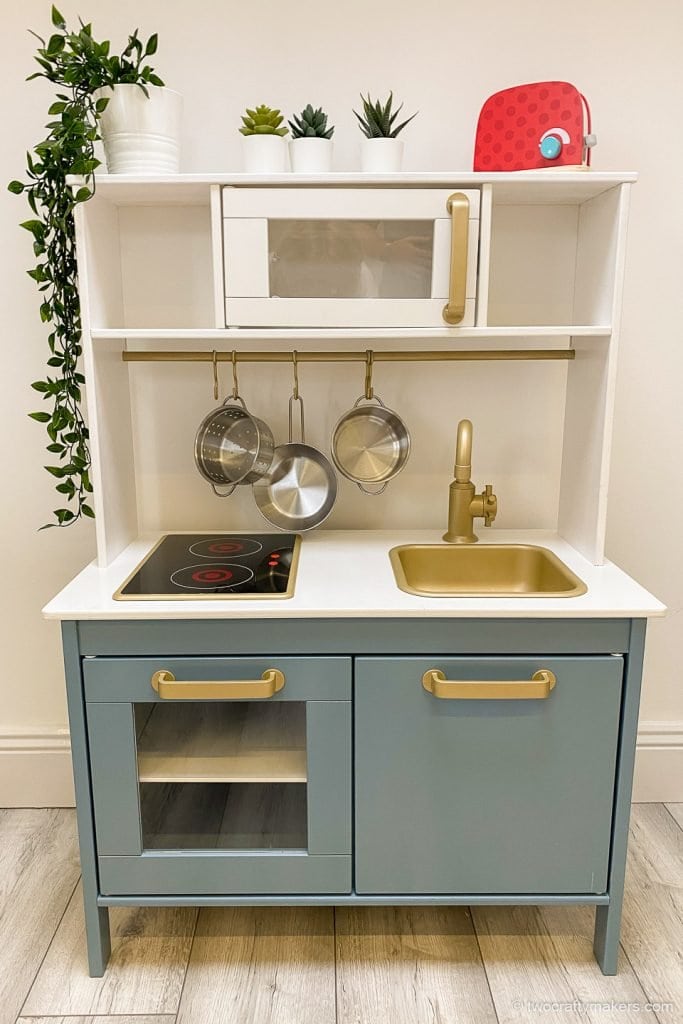
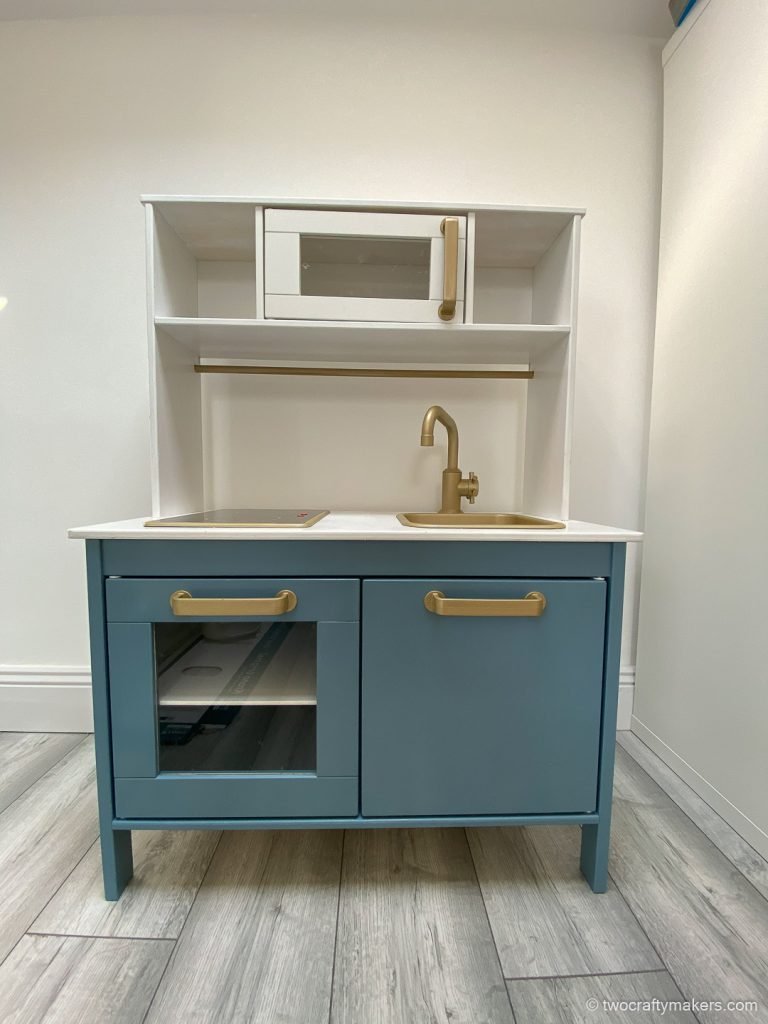
Probably the hardest but most fun part of this makeover is choosing the color scheme for the kitchen. We went with a thee tone color palette consisting of slate blue for the bottom of the kitchen, bright white for the counter top and top sections and a matte gold for the hardware.
How much paint will you need?
Depending on how much of the kitchen you plan to paint you’ll need anywhere from 1.5 to 3 cans of colored paint. We used:
- 1.5 x Rustoleum Slate Blue: we painted the inside of the cupboards in full. You could make do with 1 can if you leave these as is.
- 1.5 x Rustoleum White: we used a generous amount of white spray paint to cover the natural wooden counter top but you might get away with less.
- 1 x Rustoleum Metallic Elegant Finish Gold
Ikea Kitchen Hack tip: we’ve also got extra paint left over for any touch ups!
- 1 x No products found.
- 1 x Rustoleum regular primer
- 1 x Rustoleum Crystal Clear protective coat
Is it worth painting the Ikea Duktig Kitchen?
Yes! Our kids love their new play kitchen and it looks great in the playroom. The original Duktig follows a neutral color scheme and we found that adding a splash of color really brings it to life. Plus it’s a super easy transformation and only requires a little planning and some extra time in addition to assembly of the Duktig. We highly recommend trying it!
Ikea Play Kitchen Hack: Step by Step Instructions
Follow these instructions to create an awesome Ikea Kids Kitchen makeover!
Step 1 | Organize the Duktig parts
Like everything from Ikea the Duktig comes flat packed! Once you’ve opened the Duktig box you’ll need to lay out all the parts on the ground and mentally assemble them so you know where each piece goes. You may need to part assemble some of the kitchen as it can be tricky to visualize how it look when complete. This will allow you to identify what color to paint each piece.
We planned to paint the wood in two colors, light blue and white, so we marked out which pieces were from the base and top.
Ikea play kitchen hack tip: mark the back of each piece lightly in pencil to help identify what color they should be.
There are some pieces that won’t need painted as they won’t be visible:
- the base piece that faces the floor
- the underneath of the kitchen counter
- the back portion of the cupboard section
- the shelves for the cupboards or the microwave door (dependent on color scheme)
If you are planning on painting the handles, sink and hob surround then put these to one side for painting separately. These will need a special plastic primer.
Step 2 | Tape off the prep
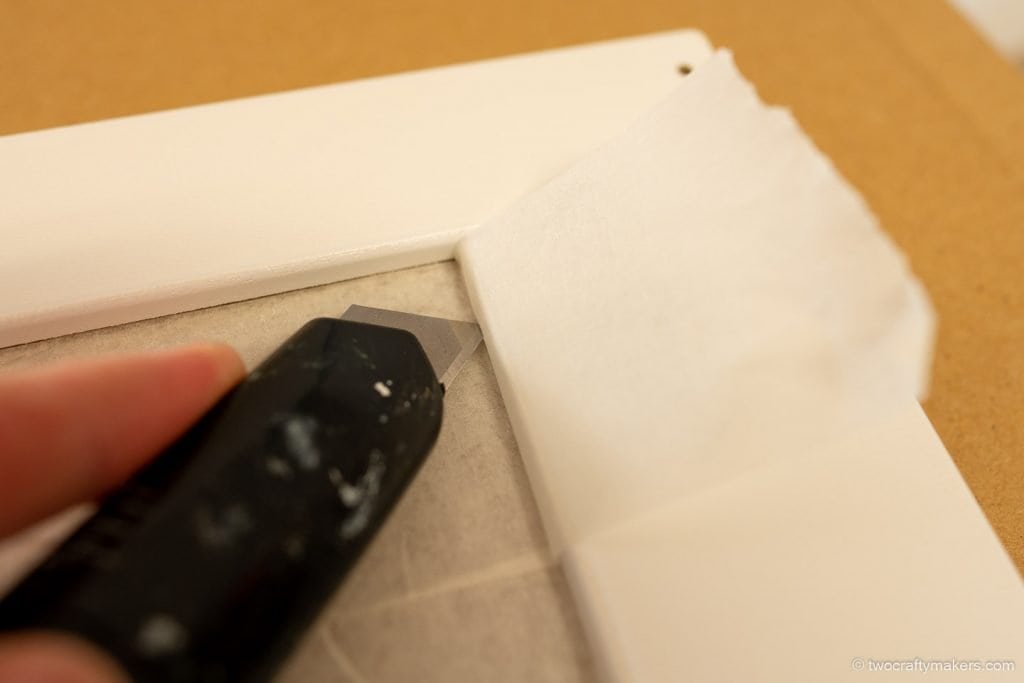
Once you’ve organised the pieces you’ll need to protect some parts from the spray paint. The spray paint will cover everything so it is best to try to cover as much as possible of the parts you aren’t painting The hob top, the glass of the microwave section and the window to the oven/cupboard will all need to be taped up. We used low tack painters tape to protect these sections.
For the windows make sure to use a blade to push the tape to cover as much of the plastic window as possible. Be careful when cutting the tape as the plastic scratches easily. It is very hard to remove the paint from the clear plastic once it has dried so take care with this step.
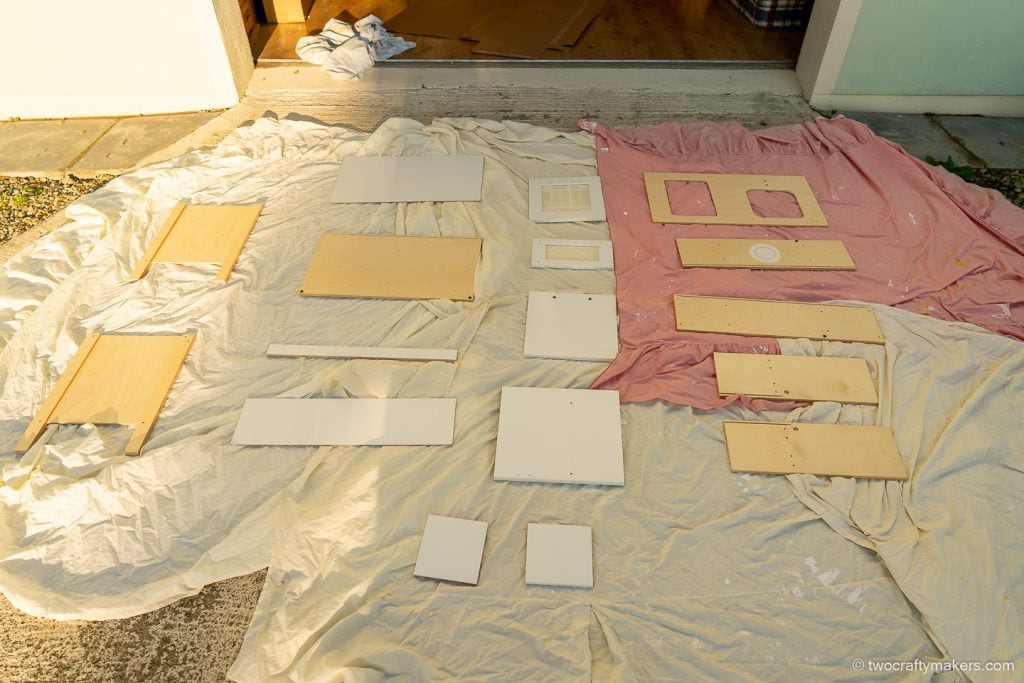
Once you have identified and marked each piece and taped up it’s time to throw down some old sheets and lay out the pieces for painting. Ideally you don’t want to have to lift the pieces at all during the painting process so it’s worth propping them up on wood or cardboard to allow you to paint the edges.
Step 3 | Paint the wooden pieces
We found that the wooden sections need three paint layers: a primer to prepare the surface, a layer of your chosen color and finally a protective clear coat.
The main color coat is the most important as it will dictate how good the finished kitchen looks. We allowed 24 hours between each of the coats so ensure a nice finish and it was worth the wait.
Ikea play kitchen hack tip: make sure to spray paint in a well ventilated area, preferably outside and keeps kids and pets away while spraying. Remember that wind is the enemy of spray paint as it blows the paint from the surface and the coverage will be poor.
Once the final coat has dried the wooden pieces are ready for assembly.
Ikea play kitchen Hack tip: Don’t forget to remove the painters tape from the windowed parts, taking care not to rip the tape off. Doing so may leave residual tape on the plastic that is tricky to remove.

Tips for using Spray Paint
- Shake the can vigorously for around a minute before starting to spray
- Hold the can around 30 cm /1 foot from the surface and work back and forth across the surface in a firm fluid motion. It will take multiple passes to cover the surface. If you try to cover too much too quickly the finish will look patchy.It takes a little practice to perfect the motion!
- Don’t start or end a spray while over the wood as it will lead to glossy spotting on the wood. So start spraying to one side and move across the surface and spray past the end of the wood before turning back.
- This is probably the most important tip – if you make a mistake or the paint smudges – do not try to fix it while the paint it wet. In fact, don’t touch it at all. Finish the remainder of the piece and wait until it is fully dry. Only when it is fully dry should you then then sand with a light paper and redo the paint.
Step 4 | Paint the plastic and metal pieces
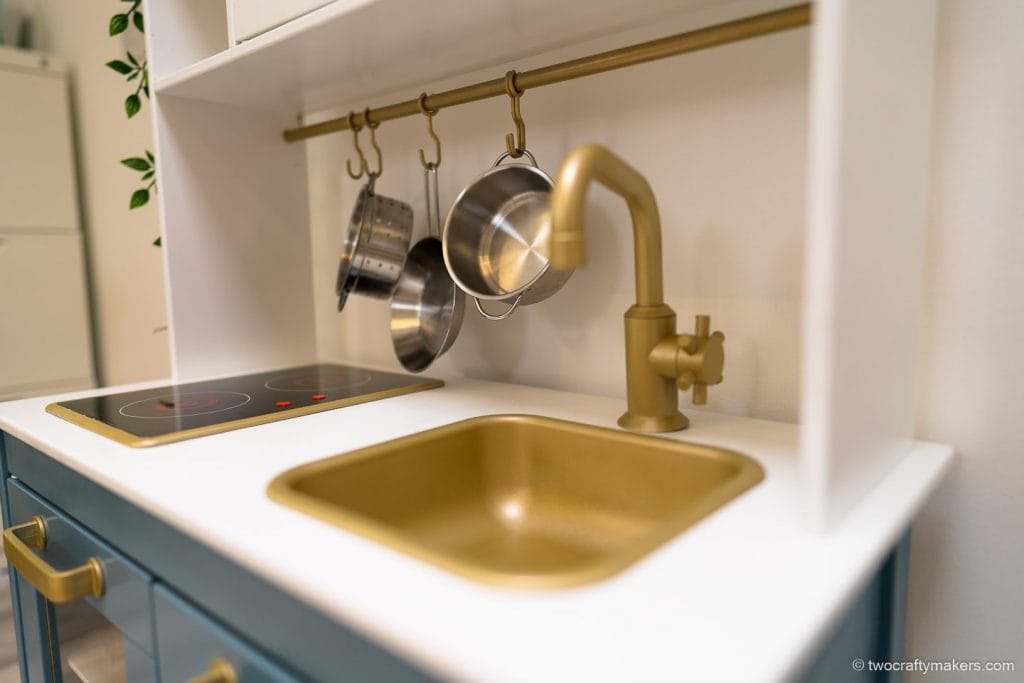
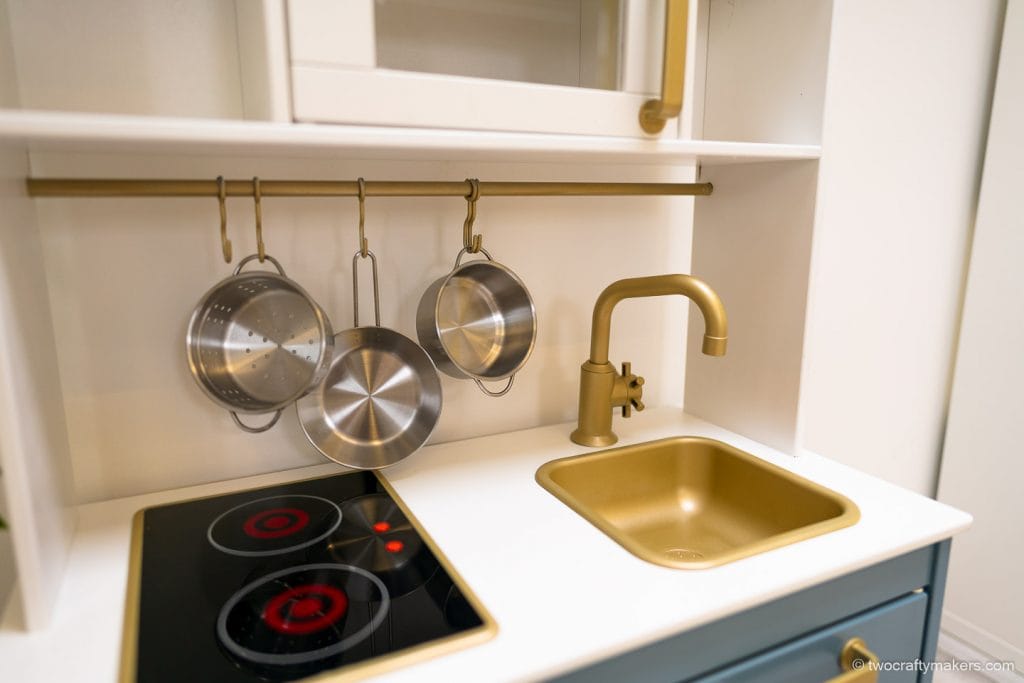
We painted the following pieces gold:
- Metal bar
- Hooks
- Door handles
- Tap
- Sink
- Hob surround
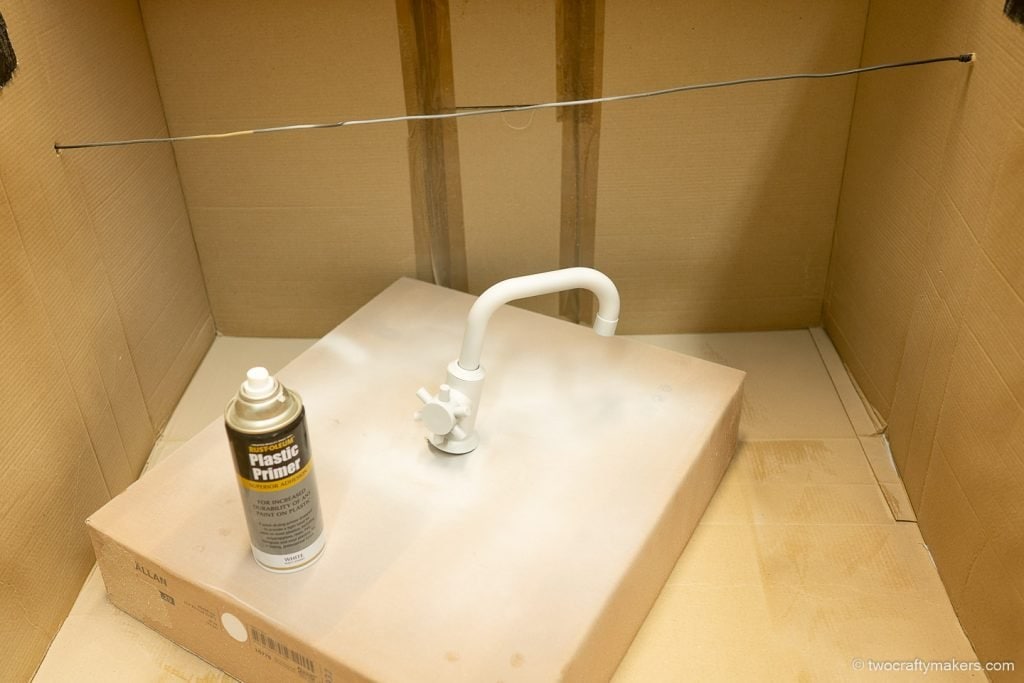
For the plastic tap, sink and hooks make sure to use Rustoleum plastic primer before applying the color coat. The plastic primer is different to the metal/wood primer as it allowed for more flexing that the plastic will experience. To help with spraying these parts we mounted the handles, hooks and tap on cardboard.
For the hob we left the protective film that it ships with untouched and simply trimmed the plastic back to allow spraying of the trim.
After a primer coat and a color coat the plastic and metal pieces should look great.
We found that the clear coat worked very well as a final coat on the metal bar, however it’s not worth applying the clear coat to the plastic pieces.
Step 5 | Counter top and Back Splash
If you opt for a patterned counter top or a back splash then now is the time to carefully apply the adhesive contact paper in preparation for assembly.
Step 6 | Assembly time!
Once every piece has been painted and is fully dried its time to assemble the kitchen and check out the finished product from your Ikea Kids Kitchen makeover!
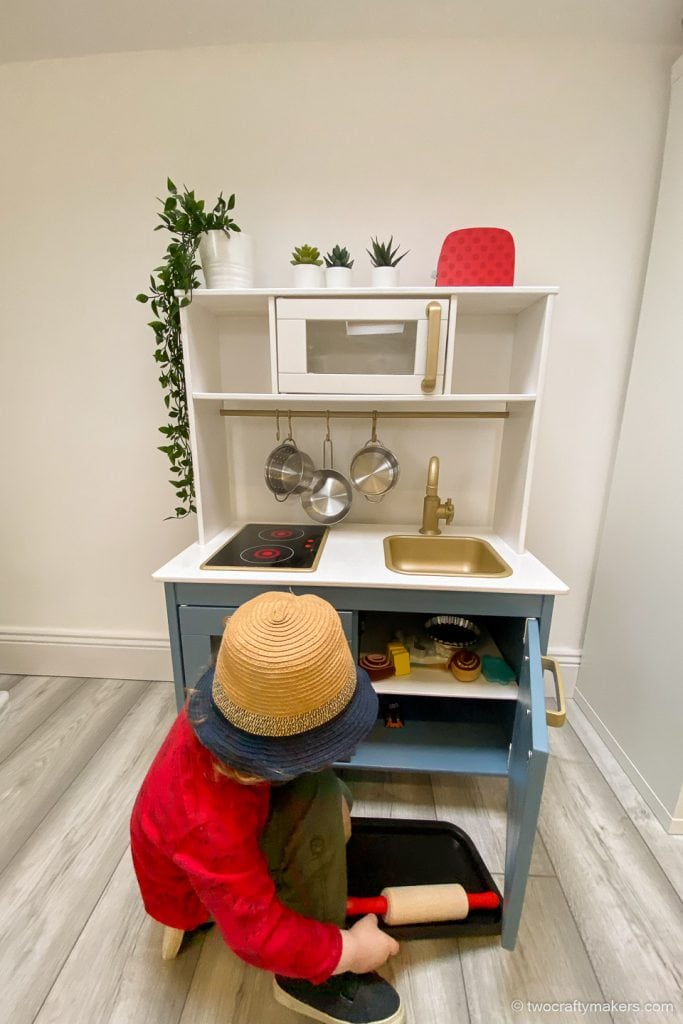
Step 7 | Accessorize
There are so many fab pieces to accessorize the play kitchen which also provide opportunities for creative and independent play. We love the:
- Ikea pots set
- Wooden toaster/juicer/coffee maker
- Play food set
- Oven gloves/tea towel
- Ikea baking set
Hi, I was wondering how many coats of gold you did on the plastic pieces. How has it held up and would you have done more?
Hi Rachel
We did two coats – one plastic primer and one gold spray. The gold has held up really well. There are definitely a few small chips where my kids have been banging metal pots and the like of it but they’re only really noticeable if you are looking for them!
Elaine